Loading...
Showing posts with label testing. Show all posts

The perfect excuse for acceptance testing

It may surprise some, that open source, as revolutionary phenomenon as it has been, is actually a very conservative way to develop software. But that also makes it such a great fit for stable organisations like established universities. Successfully participating in open source projects require long term (and often personal) commitment, but should also result in pleasant surprises.
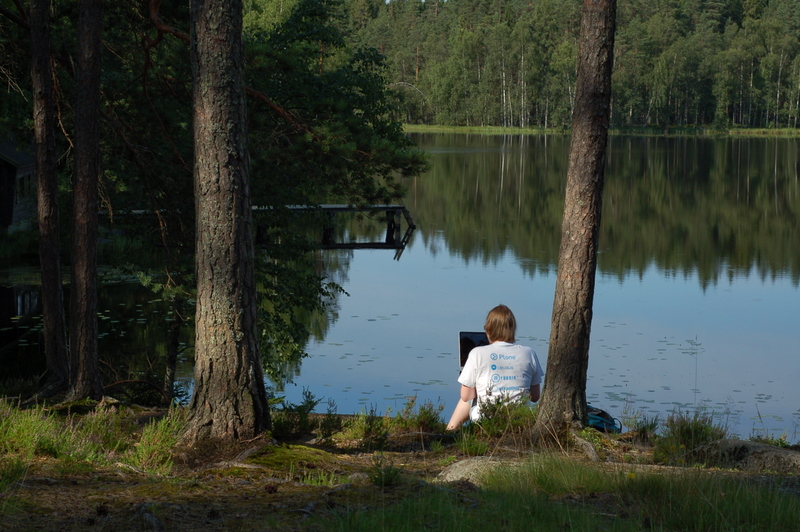
Photo by Anni Lähteenmäki
One of such surprising result from our open source collaboration has been the ability to generate documentation screenshots as a side-effect from acceptance testing. Or to put it other way, we are able to script our documentation screenshot as inline acceptance tests for the end-user features being documented. We are even able to do "documentation driven development": Write acceptance criteria into documentation skeleton and see the documentation complete with screenshot as the project develops.

We are able to script our documentation screenshot as inline acceptance tests for the end-user features being documented. We are even able to do "documentation driven development".

For example, once the required build tools and configuration boiler plate is in place, writing our end-user documentation with scripted (and therefore always up-to-date) screenshots may look like this:
Submitting a new application
============================

For submitting a new application, simply click the button and fill the form
as shown in the pictures below:

..  figure:: submit-application-01.png

    Open the form to submit a new application by pressing the button.

..  figure:: submit-application-02.png

    Fill in the required fields and press *Submit* to complete.

..  code:: robotframework

    *** Test Cases ***

    Show how to submit a new application
        Go to  ${APPLICATION_URL}

        Page should contain element
         ...  css=input[value="New application"]
        Capture and crop page screenshot
        ...  submit-application-01.png
        ...  css=#content

        Click button  New application

        Page should contain  Submit new application
        Page should contain element
        ...  css=input[value="Submit"]

        Input text  id=form-widgets-name  Jane Doe
        Input text  id=form-widgets-email  jane.doe@example.com
        Capture and crop page screenshot
        ...  submit-application-02.png
        ...  css=#content

        Click button  Submit
        Page should contain  New application submitted.
This didn't become possible just by overnight, and it would not have been possible without ideas, contributions and testing from the community. It all started almost by an accident: a crucial part between our then favourite Python testing framework and Robot Framework based cross-browser acceptance testing with Selenium was missing. we needed that part to enable one of our interns to tests their project, we choosed to implement it, many parts clicked together, and a few years later we had this new development model available in our toolbox.
The specific technology for writing documentation with acceptance testing based screenshots is a real mashup by itself:
  • The final documentation is build with Sphinx, which is a very popular software documentation tool written in Python.
  • The extensibility of Sphinx is based on a plain text formatting syntax called ReStructuredText and its mature compiler implementation Docutils, which also also written in Python.
  • Together with a Google Summer of Code student, whom I mentored, we implemented a Sphinx-plugin to support inline plain text Robot Framework test suites within Sphinx-documentation.
  • In Robot Framework test suites, we can use its Selenium-keywords to test the web application in question and capture screenshots to be included in the documentation.
  • We also implemented a library of convenience keywords for annotating and cropping screenshots by bounding box of given HTML elements.
  • For Plone, with a lot of contributions from its friendly developer community, a very sophisticated Robot Framework integration was developed, to enable setting up and tearing down complete Plone server with app specific test fixtures directly from Robot Framework test suites with a few keywords.
  • Finally, with help from the Robot Framework core developers, the new ReStructuredText support for Robot Framework was implemented, which made it possibly to also run the written documentation with scripted screenshots as a real test suite with the Robot Framework's primary test runner (pybot).
Once you can script both the application configuration and screenshots, fun things become possible. For example, here's an old short scripted Plone clip presenting all the languages supported by Plone 4 out of the box. Only minimal editing was required to speedup the clip and add the ending logo:

Any cons? Yes. It's more than challenging to integrate this approach into workflows of real technical writers, who don't usually have a developer background. In practice, automated acceptence tests must be written by developers, and also ReStructuredText is still quite technical syntax to write documentation. Therefore, even for us this toolchain still remain quite underused.

Evolution of a Makefile for building projects with Docker

It's hard to move to GitLab and resist the temptation of its integrated GitLab CI. And with GitLab CI, it's just natural to run all CI jobs in Docker containers. Yet, to avoid vendor lock of its integrated Docker support, we choosed to keep our .gitlab-ci.yml configurations minimal and do all Docker calls with GNU make instead. This also ensured, that all of our CI tasks remain locally reproducible. In addition, we wanted to use official upstream Docker images from the official hub as far as possible.

As always with make, it it's a danger that Makefiles themselves become projects of their own. So, let's begin with a completely hypothetical Makefile:

all: test

test:
     karma test

.PHONY: all test
https://blogger.googleusercontent.com/img/b/R29vZ2xl/AVvXsEir8OjBL-SnzB5NIWkVycHXMoGFWPc0apN_Fck51eSg3tEDAeGO21rpbMZe4VPRxe-KdZtuQSZd2Cr_-tjMmGOb9dbmxxRhBJ-TmEMuW65itRVaKgIcAUX_y0vooFgRWFOtATm0e2ALeJK1/s1600/IMG_0370.JPG

Separation of concerns

At first, we want to keep all Docker related commands separate from the actual project specific commands. This lead us to have two separate Makefiles. A traditional default one, which expects all the build tools and other dependencies to exist in the running system, and a Docker specific one. We named them Makefile (as already seen above) and Makefile.docker (below):

all: test

test:
     docker run --rm -v $PWD:/build -w /build node:5 make test

.PHONY: all test

So, we simply run a Docker container of required upstream language image (here Node 5), mount our project into the container and run make for the default Makefile inside the container.

$ make -f Makefile.docker

Of course, the logical next step is to abstract that Docker call into a function to make it trivial to wrap also other make targets to be run in Docker:

make = docker run --rm -v $PWD:/build -w /build node:5 make $1

all: test

test:
     $(call make,test)

.PHONY: all test

Docker specific steps in the main Makefile

In the beginning, I mentioned, that we try to use the official upstream Docker images whenever possible, to keep our Docker dependencies fresh and supported. Yet, what if we need just minor modifications to them, like installation of a couple of extra packages...

Because our Makefile.docker mostly just wraps the make call for the default Makefile into a auto-removed Docker container run (docker run --rm), we cannot easily install extra packages into the container in Makefile.docker. This is the exception, when we add Docker-related commands into the default Makefile.

There are probably many ways to detect the run in Docker container, but my favourite is testing the existence of /.dockerenv file. So, any Docker container specific command in Makefile is wrapped with test for that file, as in:

all: test

test:
     [ -f /.dockerenv ] && npm -g i karma || true
     karma test

.PHONY: all test

Getting rid of the filesystem side-effects

Unfortunately, one does not simply mount a source directory from the host into a container and run arbitrary commands with arbitrary users with that mount in place. (Unless one wants to play to game of having matching user ids inside and outside the container.)

To avoid all issues related to Docker possibly trying to (and sometimes succeeding in) creating files into mounted host file system, we may run Docker without host mount at all, by piping project sources into the container:

make = git archive HEAD | \
       docker run -i --rm -v /build -w /build node:5 \
       bash -c "tar x --warning=all && make $1"

all: test

test: bin/test
     $(call make,test)

.PHONY: all test
  • git archive HEAD writes tarball of the project git repository HEAD (latest commit) into stdout.
  • -i in docker run enables stdin in Docker.
  • -v /build in docker run ensures /build to exist in container (as a temporary volume).
  • bash -c "tar x --warning=all && make $1" is the single command to be run in the container (bash with arguments). It extracts the piped tarball from stdin into the current working directory in container (/build) and then executes given make target from the extracted tarball contents' Makefile.

Caching dependencies

One well known issue with Docker based builds is the amount of language specific dependencies required by your project on top of the official language image. We've solved this by creating a persistent data volume for those dependencies, and share that volume from build to build.

For example, defining a persistent NPM cache in our Makefile.docker would look like this:

CACHE_VOLUME = npm-cache

make = git archive HEAD | \
       docker run -i --rm -v $(CACHE_VOLUME):/cache \
       -v /build -w /build node:5 \
       bash -c "tar x --warning=all && make \
       NPM_INSTALL_ARGS='--cache /cache --cache-min 604800' $1"

all: test

test: bin/test
     $(INIT_CACHE)
     $(call make,test)

.PHONY: all test

INIT_CACHE = \
    docker volume ls | grep $(CACHE_VOLUME) || \
    docker create --name $(CACHE_VOLUME) -v $(CACHE_VOLUME):/cache node:5
  • CACHE_VOLUME variable holds the fixed name for the shared volume and the dummy container keeping the volume from being garbage collected by docker run --rm.
  • INIT_CACHE ensures that the cache volume is always present (so that it can simply be removed if its state goes bad).
  • -v $(CACHE_VOLUME:/cache in docker run mounts the cache volume into test container.
  • NPM_INSTALL_ARGS='--cache /cache --cache-min 604800' in docker run sets a make variable NPM_INSTALL_ARGS with arguments to configure cache location for NPM. That variable, of course, should be explicitly defined and used in the default Makefile:
NPM_INSTALL_ARGS =

all: test

test:
     @[ -f /.dockerenv ] && npm -g $(NPM_INSTALL_ARGS) i karma || true
     karma test

.PHONY: all test

Cache volume, of course, adds state between the builds and may cause issues that require resetting the cache containers when that hapens. Still, most of the time, these have been working very well for us, significantly reducing the required build time.

Retrieving the build artifacts

The downside of running Docker without mounting anything from the host is that it's a bit harder to get build artifacts (e.g. test reports) out of the container. We've tried both stdout and docker cp for this. At the end we ended up using dedicated build data volume and docker cp in Makefile.docker:

CACHE_VOLUME = npm-cache
DOCKER_RUN_ARGS =

make = git archive HEAD | \
       docker run -i --rm -v $(CACHE_VOLUME):/cache \
       -v /build -w /build $(DOCKER_RUN_ARGS) node:5 \
       bash -c "tar x --warning=all && make \
       NPM_INSTALL_ARGS='--cache /cache --cache-min 604800' $1"

all: test

test: DOCKER_RUN_ARGS = --volumes-from=$(BUILD)
test: bin/test
     $(INIT_CACHE)
     $(call make,test); \
       status=$$?; \
       docker cp $(BUILD):/build .; \
       docker rm -f -v $(BUILD); \
       exit $$status

.PHONY: all test

INIT_CACHE = \
    docker volume ls | grep $(CACHE_VOLUME) || \
    docker create --name $(CACHE_VOLUME) -v $(CACHE_VOLUME):/cache node:5

# http://cakoose.com/wiki/gnu_make_thunks
BUILD_GEN = $(shell docker create -v /build node:5
BUILD = $(eval BUILD := $(BUILD_GEN))$(BUILD)

A few powerful make patterns here:

  • DOCKER_RUN_ARGS = sets a placeholder variable for injecting make target specific options into docker run.
  • test: DOCKER_RUN_ARGS = --volumes-from=$(BUILD) sets a make target local value for DOCKER_RUN_ARGS. Here it adds volumes from a container uuid defined in variable BUILD.
  • BUILD is a lazily evaluated Make variable (created with GNU make thunk -pattern). It gets its value when it's used for the first time. Here it is set to an id of a new container with a shareable volume at /build so that docker run ends up writing all its build artifacts into that volume.
  • Because make would stop its execution after the first failing command, we must wrap the make test call of docker run so that we
    1. capture the original return value with status=$$?
    2. copy the artifacts to host using docker cp
    3. delete the build container
    4. finally return the captured status with exit $$status.

This pattern may look a bit complex at first, but it has been powerful enough to start any number of temporary containers and link or mount them with the actual test container (similarly to docker-compose, but directly in Makefile). For example, we use this to start and link Selenium web driver containers to be able run Selenium based acceptance tests in the test container on top of upstream language base image, and then retrieve the test reports from the build container volume.

Blazingly fast code reload with fork loop

The Plone Community has project long traditions for community driven development sprints, nowadays also known as "hackathowns". For new developers, sprints are the best possible places to meet and learn from the more experienced developers. And, as always, when enough openly minded developers collide, amazing new things get invented.

https://blogger.googleusercontent.com/img/b/R29vZ2xl/AVvXsEgyxSJKSBMvK0zx0TxXTmnOLC7uBZHe7Rl3Mrw7y7S0QAfru_wkfRvImo7BeX0nUx5UZWdYa91bBQYlnHQ08dbtl6ApLSU2AjlDnnMHwJHW0pvDqweBv1I6-nVRoGxtTZe93XneO1pr4thx/s1600/046_groupphoto.jpg

One of such event was the Sauna Sprint 2011 at Tampere, Finland, organized by EESTEC. During the sprint, from the idea by Mikko Ohtamaa, with the help from top Zope and Plone developers of the time, we developed a fast code reloading tool, which has significantly speeded our Plone-related development efforts ever since.

So, what was the problem then? Plone is implement in Python, which is a dynamically interpreted programming language, already requiring no compilation between change in code and getting change visible with a service restart. Yet, Plone has a huge set of features, leading to a large codebase, and a long restart time. And when you are not doing only TTD, but also want to see the effects of the code changes in running software (or re-run acceptance tests), restart time really affects development speed. Python language did had its own ways for reloading code, but there were corner cases, where everything was not really reloaded.

While our tool is strictly specific to Plone, the idea is very generic and language independent (and, to be honest, also we did borrow it from a developer community of another programming language). Our tool implemented and automated a way to split the code loading in Plone startup into two parts: The first part loads all the common framework code, and the second part only our custom application code. And by loading, we really mean loading into the process memory. Once the first part is loaded, we fork the process, and let the new forked child proces to load the second part. And every time a change is detected in code, we simply kill the child process and fork a new one with clean memory. What could possibly go wrong?

That was already almost five years ago and we are still happily using the tool. Even better, we did integrate the reloading approach for a volatile Plone development server with pre-loaded test fixture: each change to code or fixture restarts the server and reloads the fixture. acceptance tests for it. No more time wasted for the other developer to continue from where you left.

https://blogger.googleusercontent.com/img/b/R29vZ2xl/AVvXsEj8LwgC5UTUPWnPnThRvJhILXKLdIY2l3NUu7W14e7eGC3VSrzVHwM0Bz51DIbIaoYMocl4ogSKCumwFE0P8KWMftCQehY7cqmKg9xnPFKxBBX1cDwVcbh-2KHZl4-DGRNBVwqv7VS6E_Q5/s1600/DSC_0184.jpg